

Addressable WS2811 RGB LED control:
WS2811 addressable RGB LEDs are Great for producing different colors. Let’s make a WS2811 RGB LED control RGB LED Controller For controlling the Pixel LEDs. And also I want to thank PCBWAY for helping with their huge components list. In the COVID19 situation, they are providing most of the great PCBs. So, why you are waiting for? Place your first order from PCBWay.com.
Needed Components:
Bangood Links:
- Arduino Uno R3 Board: https://www.banggood.in/custlink/KGmEP3mgSP
- WS2812B LEDs: https://www.banggood.in/custlink/KGDhF3ve8Z
- 5V Power Supply: https://www.banggood.in/custlink/GDmd5G34ig
- IRFZ44N: https://www.banggood.in/custlink/K3vdVGD6Zb
- LED: https://www.banggood.in/custlink/mGDdPvm0ah
- Resistor: https://www.banggood.in/custlink/DvGyP3G4o8
- Capacitor: https://www.banggood.in/custlink/vvv3P75QMa
- Soldering Iron: https://www.banggood.in/custlink/KvKd5mmbhH
Amazon.com Links:
- Arduino Uno R3 Board: https://amzn.to/3jgfrl7
- WS2812B LEDs: https://amzn.to/3ikuKYS
- 5V Power Supply: https://amzn.to/33lx9Oy
- IRFZ44N: https://amzn.to/3l79ZRU
- LED: https://amzn.to/2GnZWJt
- Resistor: https://amzn.to/3la83bH
- Capacitor:https://amzn.to/3ii0IVr
- Soldering Iron: https://amzn.to/3naliKX
What are the ws2811 LEDs?
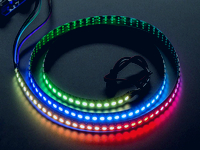
ws2811 is an RGB LED. But it is not a simple RGB LED strip. It is an addressable RGB LED. It means you can control every led color with a data signal input.
You can get these data signals from different things like Arduino Board’s Digital pin, from a proper RGB LED controller, and many more. The main thing is that this data signal is a PWM pulse. Thes PWM pulses run the LEDs.
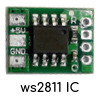
The LED atrip which I am using is ws2811 addressable RGB LED. The name ws2811 comes from the driver IC ws2811. For this, we call this the ws2811 LEDs.
Sometimes the IC may be inside the LED this type of LED is known as ws2812 LEDs. These LEDs also work in the same principle.
This ws2811 addressable RGB LED runs on DC 5V. So you should take care of voltage polarity.
The WS2811 RGB LED Controller which we are making today also works on DC 5V
Connection for WS2811 RGB LED:
- The RGB LED strips I have bought, have a Male port and a Female port. The male port is used for sending the data signal from the controller to the LEDs. And the female port is used for sending the data signal into the next LED strips. In this way, the connection goes and we can control a WS2811 RGB LED.
- The LEDs take DC 5V to run. But we all know that DC has some great losses. So you will see that the LED near the power supply is glowing more than the Last LED strips.
- For solving this problem we need to connect all LEDs +ve and all LEDs GND. Then we have to give the power in each and every strip.
Controller:
In this case, there are 2 options. You may buy some premade controllers. Which will be easier to program with the given software. You will get a simple software interface that will help you if you don’t want to mess with the coding stuff. Here are some WS2811 RGB LED controller Links.
- T1000s(Most Popular and Cheap Controller): Click Here
- SP105E: Click Here
- SP108E: Click Here
- HC008: Click Here
But I will suggest you use Arduino IDE as a controller. It will help you to grow your coding knowledge.
YouTube Video for WS2811 RGB LED control:
Watch the Youtube Video and it will be easier to Understand. https://youtu.be/nnapNHn-Ge0
Arduino as WS2811 RGB LED Controller:
- Here I will use some basic examples from the Arduino library
- Now see the video tutorial on how to use this and what parameters you have to change. Let me say in a quick summary.
- The LED_Pin is also known as the Data_Pin. The pin is used for providing the data signal into the LEDs.
- The Num_LED is also known as the Number of LEDs. Here you have to give the Total LED Numbers you are connecting with the LEDs.
In some codes, you will find set Brightness options. This option is mainly used for setting the proper brightness of the LEDs. Here we will talk about Digital Values. Here the total Range is 0 to 255. Now the 0 is for 0% brightness and the 255 is for 100% brightness. You can use any values between these two values for the WS2811 RGB LED Controller.
While working with these two libraries I find that the fastLED library works flawlessly and easy to understand. And here you can code one by one and you can also use any array for lighting up the LEDs.
- Suppose you want to run the LED 1 then you can write a single line of code and make the LEDs glowing.
- You can make simple ‘for_loops’ for running the LEDs. This library really makes sense.
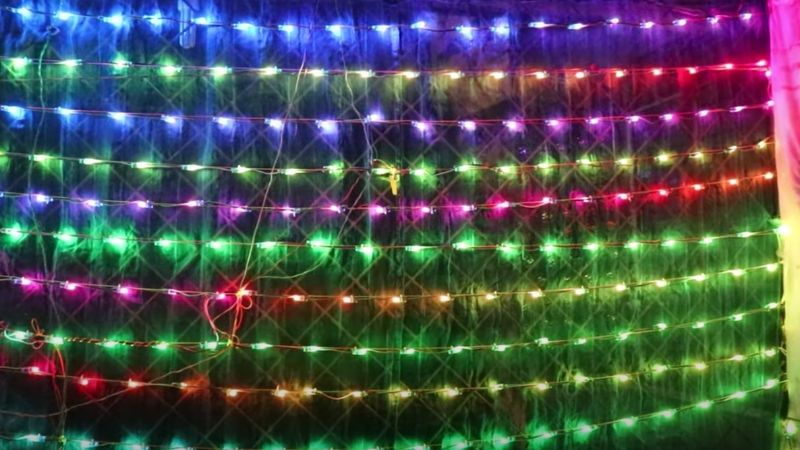
Form Matrics:
You can make a great display with these LEDs in main cases the LEDs which is used are ws2812 LEDs. These LEDs have high Density so it means the display which will be produced would be much greater compared with ws2811 LEDs.
For making the picture you will need an LED Driver because there are too many LEDs you can’t control all of them with one Arduino (It is not impossible. But it is very hard to do with Arduino to run a video file through Arduino). So basically people use a proper t300k controller for controlling these LEDs. And it is easy to do.
You will need an ethernet cable for it. Connect the controller with your pc and then open the given software. Then run any video file and your video file will run in the display. It is very simple.
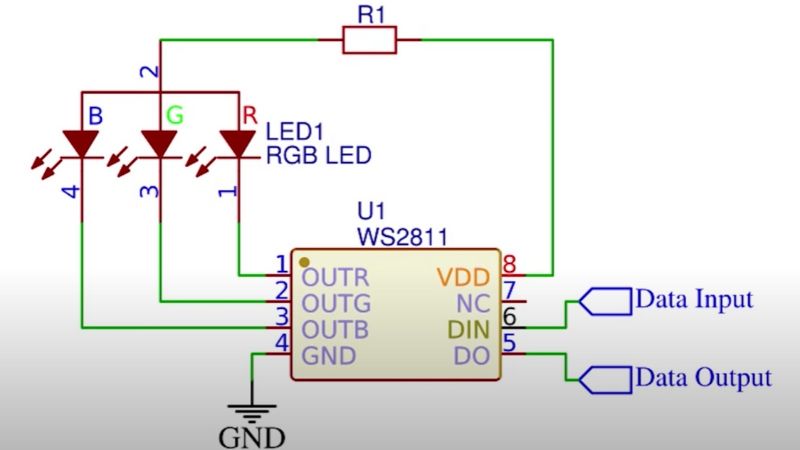
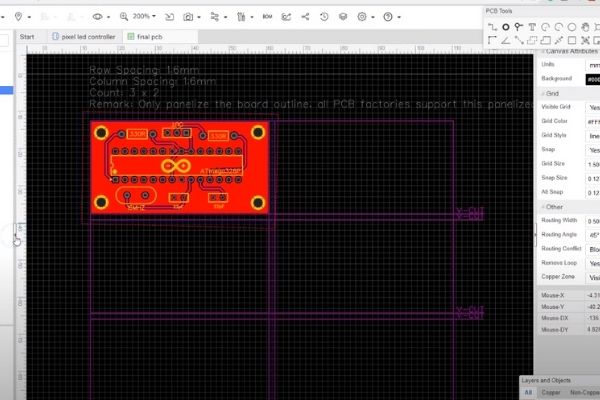
Schematics:
![]()
PCB process:
In this project, we will need a controller and some other complementary components for running the atmega328P chip. By the way, if you have a lower budget then you can use the atmega8 chip also. The atmega8 chip also has the same complementary components. And you can also control the atmega8 chip with Arduino Uno using Arduino as ISP.
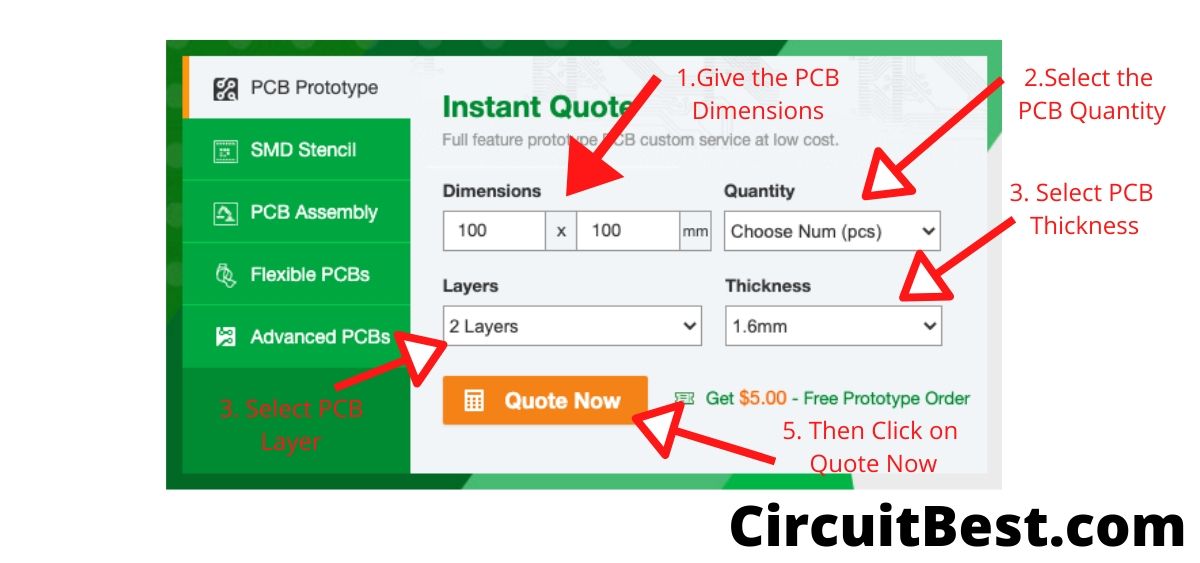
For the PCB production, I have chosen the PCBWay website. They are one of the largest PCB manufacturers in china. Just Upload your Garber files today and get your first 10 PCBs only for 5 dollars. The processing time is fast and the shipping time is also very quick and you can see the PCB Quality in the video. Those are great.
These are the simple steps for ordering PCB from PCBWay.com
PCB Garber: Download
Notes:
Make sure that you are connecting the LEDs as close as possible. This LED runs on the PWM pulses. The pulses will become weaker at the end of the strips. So you should use the data wire as short as possible.
Make sure you have connected a proper 5V power supply. Higher amps than the Calculated amps. So, it will give the Lights a long life.
After connecting ws2811 addressable RGB LEDs you should check the brunch voltage at very nodes. If you find that your power supply is giving about 5.2v and every brunch has 4.5v above then the Connection is ok but if you find in some brunches the is a voltage below 3v then you should use high gauge wires for this connection. In this case, the main loss will be. In the wires, so you should take care in this case.
Just try to connect all the LEDs in U pattern don’t use z pattern. Because the Z pattern has serious data issues. If you are using thin wires you will find some of the first LEDs will run fluently. But in last there will be some flickering in the LEDs. This thing is not good for the LEDs.
This note is for My special Indian Users only. Please don’t buy this ws2811 addressable RGB LEDs in the festival time, in this case, the price will be higher than other sales time. So please If you are planning to buy these LEDs then please buy it in off-seasons. You may get 10$ or I think 700Rs less in one packet of purchase.
You Can also Read our other Article About Android Controlled RGB LED Strip Using Arduino