

Bluetooth Car with Lights:
In this article, we are going to make Arduino Bluetooth control car with Front & Back Lights. While doing any school or college projects the Arduino is one of the most useful budget options for hobbyists for making Bluetooth controlled robot project ppt. Arduino is like a little computer that works by following our instructions. This is a simple guide for beginners who want to make a Bluetooth car and don’t have enough knowledge of Electronics. I would try to explain every step clearly in this article. We have to code for giving Instructions. We have to write in c, C++ language for programming. The Arduino Microcontroller compiles the code and runs as we want it to. This is Version 2.0 from my previous Bluetooth remote control car.
What is an Arduino Bluetooth controlled car with Front & Back Lights?
Bluetooth car is mainly a simple RC Car that is mainly controlled over Bluetooth Protocol. An Arduino Bluetooth Module (HC-05 or HC-06) is necessary for controlling the car over Bluetooth signal through Android Device.
How do you control a Bluetooth car?
A Bluetooth-controlled car is a simple car that runs on a wireless Bluetooth signal. In Arduino, we have mainly 2 Bluetooth Options HC-05 and HC-06. In this article, we are mainly focusing on HC-05 Bluetooth Module. The HC-05 has many features compared to HC-06 Like we can use HC-05 as a Master and Slave device. And we can Send, Receive and Display Data with this Bluetooth module.
How do I control my RC car with Bluetooth?
There are many ways for controlling the Bluetooth car. We can use Gamepad, Custom Made controller with HC-05, and much more. But for making things simple I am using an Android Phone couple with an android app for controlling the car.
Watch YouTube Video:
Here is a video from YouTube shows How do I make my Arduino wireless remote control my car? So, watch the video and It will be easy for you to understand everything.
Tools Required for Wireless Car control system based on Arduino UNO R3:
- Soldering Iron
- Glue Gun
- Zip Tie
- 3RD Hand for Soldering.
Things needed for Bluetooth Controlled Robot using Arduino and l293d:
Amazon.in Links:
- Arduino UNO: https://amzn.to/31sEgU4
- TT Gear Motor: https://amzn.to/2FLFeTF
- 65MM Wheels for TT Motors: https://amzn.to/31rrghv
- HC-05: https://amzn.to/37G9fzQ
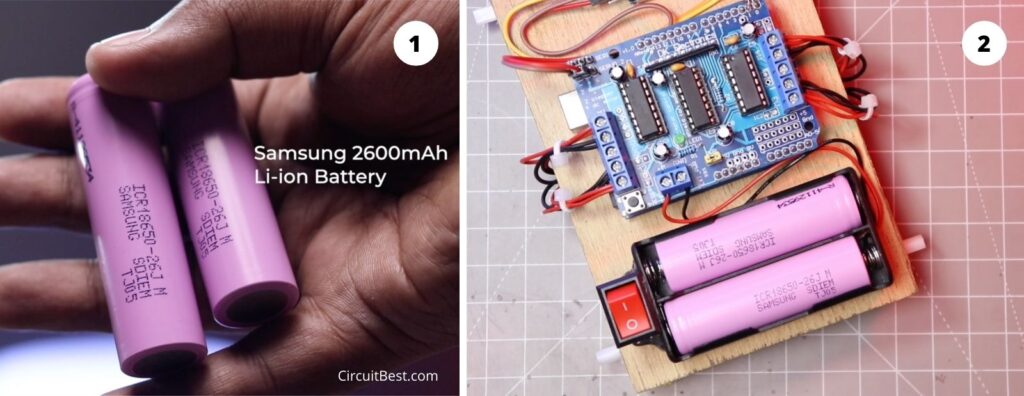
- 18650 Battery: https://amzn.to/34hsldt
- 2S, 18650 Battery Holder: https://amzn.to/2TdA1XY
- L293D Motor Driver: https://amzn.to/3dRU9s6
- Switch: https://amzn.to/3dSMREx
- Jumper Wire: https://amzn.to/2HqWHBb
- Soldering Iron: https://amzn.to/2HldvtF
- Glue Gun: https://amzn.to/3mcr51m
- Samsung 18650 Battery: https://amzn.to/2V4CvZE
- 10MM RED LED: https://amzn.to/3m88cxb
- 8MM White LED: https://amzn.to/3nYpywL
- 180R Resistor: https://amzn.to/3lc6KIC
- Double Sided Tape: https://amzn.to/3nYrwgD
- Wire for Motor Connection: https://amzn.to/3ld1Lax
Amazon US Links:
- Arduino UNO R3: https://amzn.to/2SuROJC
- TT Gear Motor: https://amzn.to/3nf4l29
- Wheels: https://amzn.to/30zkFRI
- HC-05 Bluetooth Module: https://amzn.to/36w2DU5
- 18650 Battery Holder: https://amzn.to/34nOVA6
- 18650 Battery: https://amzn.to/36EeUWu
- L293D Motor Driver: https://amzn.to/3ng7Xks
- Switch: https://amzn.to/3ivaUdw
- Jumper Wires: https://amzn.to/3izMFe2
- Samsung 18650 Battery: https://amzn.to/2JaAKb0
- 10mm RED LED: https://amzn.to/2Kxx8jx
- 8MM White LED: https://amzn.to/3fAjuYk
- 180R Resistor: https://amzn.to/2V3TbAt
- Wire for motor connection: https://amzn.to/2HEg4aF
- Double-Sided Tape: https://amzn.to/365cAaz
Banggood Links:
- Arduino UNO R3: http://bit.ly/2FZY6dT
- TT Gear Motor: https://bit.ly/2Mlb35E
- Wheels: https://bit.ly/2U10QPM
- HC-05 Bluetooth Module: http://bit.ly/2ukQvod
- 18650 Battery Holder: https://bit.ly/2MkPYrW
- 18650 Battery: https://bit.ly/3eBNH7N
- L298N Motor Driver: https://bit.ly/3gB8Ws6
- L293D Motor Driver: https://bit.ly/2CHPqdT
- Switch: https://bit.ly/3ds4Xfy
- Jumper Wires: https://bit.ly/2MjLy4t
Popular Categories:
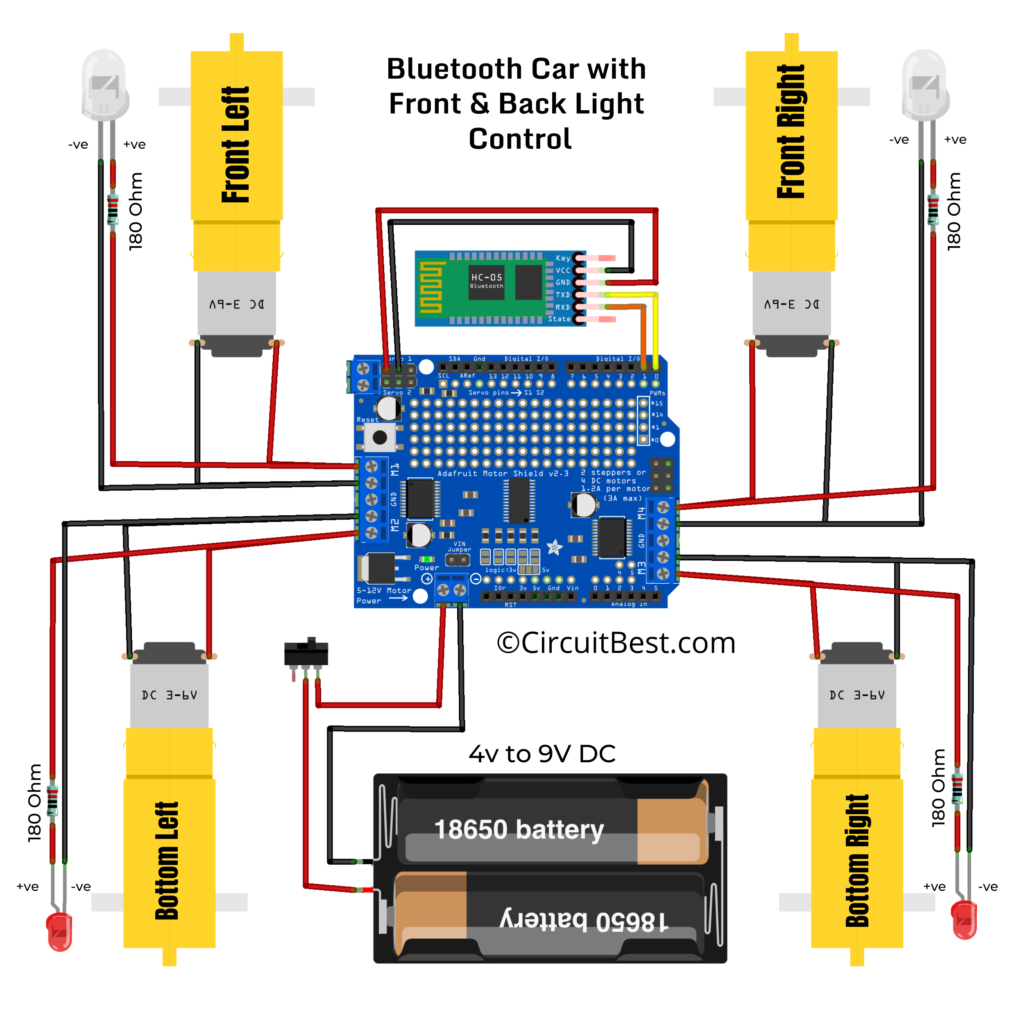
Schematics of the Bluetooth controlled car using Arduino project report:
Here is the schematics for Remote Control car using Arduino. Here I used TT Gear Motors for making the car. For the Front and Back Lights I used White and Red Lights for indication. Resistors are necessary for this build otherwise the LEDs will be fried by the voltage in matter of seconds.
Steps for making Arduino Bluetooth car l293d:
Step 1:
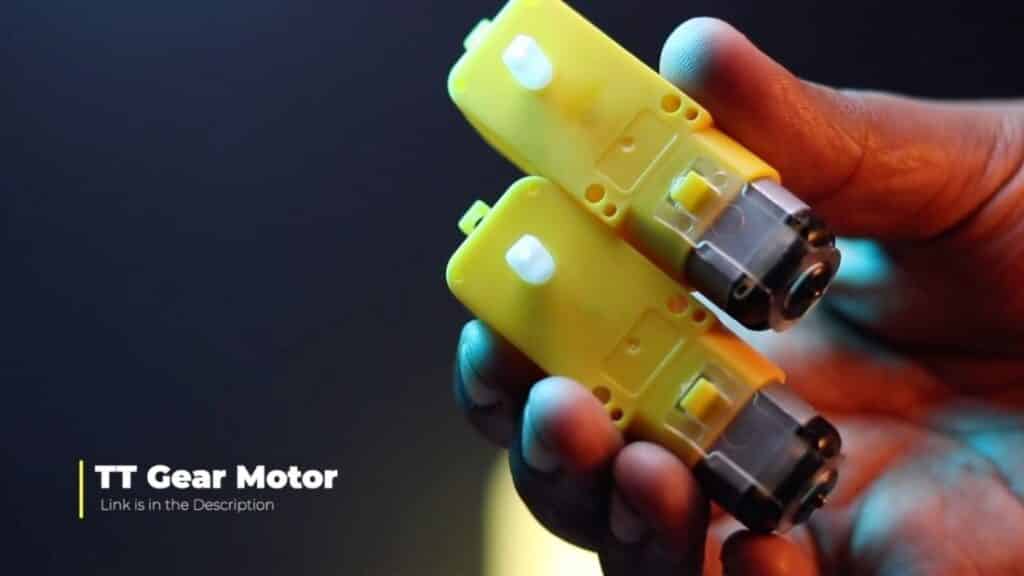
Firstly, we will need Motors. for making. the car. At a minimum, you can use 2 motors for the left and right sides, But in this Project, we are using 4 DC Gear motors. More specifically, Here we are using 300RPM 9v TT Gear Motor for making Arduino Bluetooth car l293d.
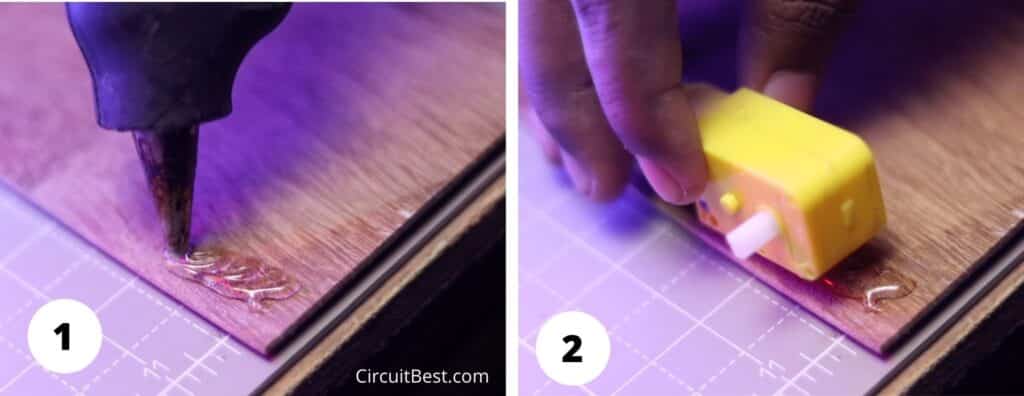
I am using a Small Plywood Board for making the chassis. For attaching the motor with the chassis we are using a Hot Glue gun. In this same process we. have to connect all the 4 Motors. at the 4 Sides.
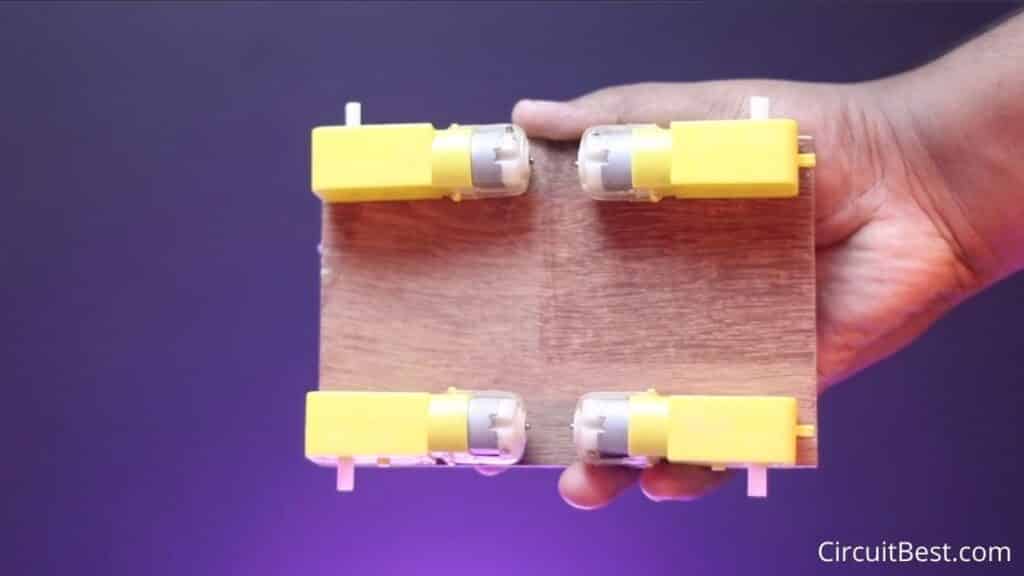
After connecting all 4 Motors the Plywood Chassis will look like this. Try to maintain the Orientation and equal distance as I have shown in the Picture. I will also provide you Bluetooth controlled car using Arduino project report.
Note:
- In this project, I am using TT Gear Motor. These Motors are cheap and also good for small projects. But If you have some different motors with the same voltage (6v to 12v) & current (200mA to 1000mA) range, Then you can also use that motors as well.
- For the Chassis, I have used a small piece of Plywood. That works great for my work. You can also use Acrylic Sheet, Fiber sheet, and any other things for the Bluetooth controlled car using Arduino and l293d.
- If you don’t have Glue Gun then you can also use any other strong Glue. But I would suggest you use a glue gun with a stick. This will work great for Arduino Bluetooth car L293D motor shield.
Step 2:
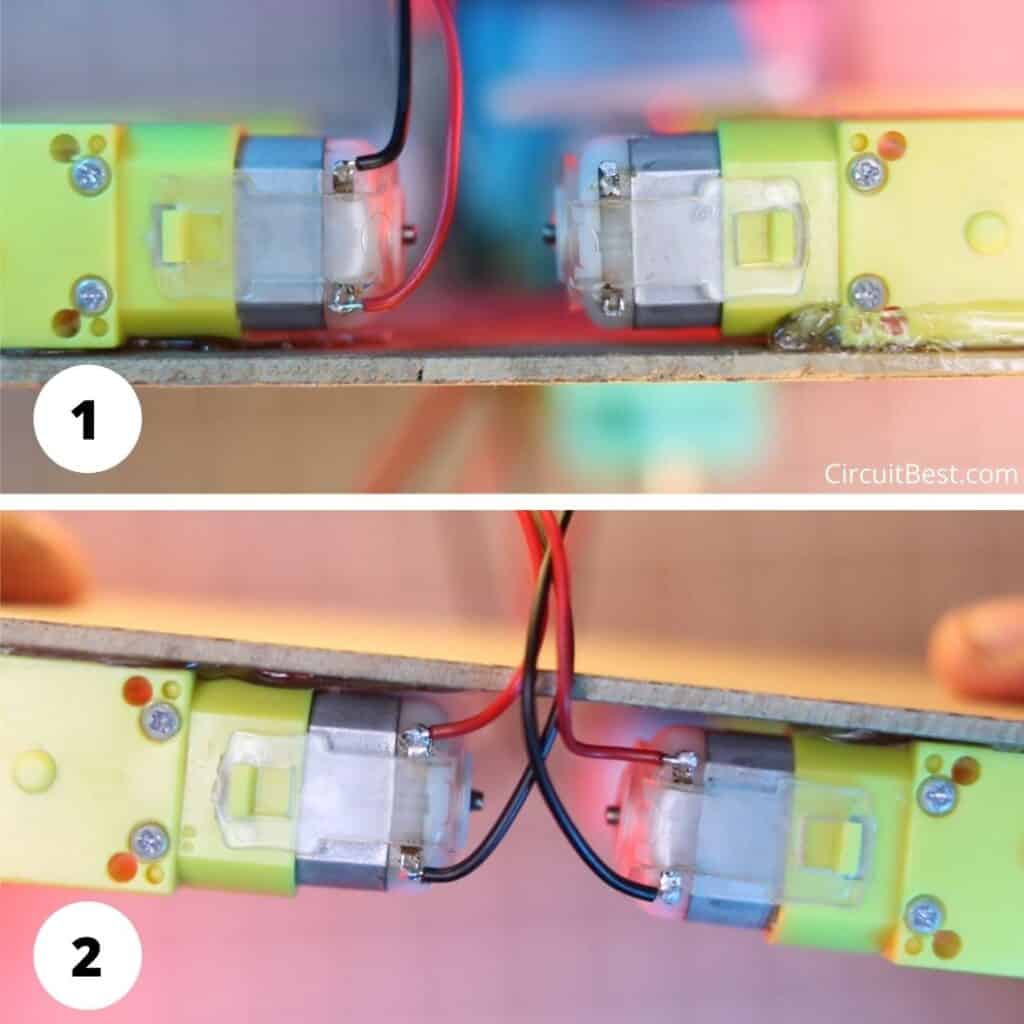
Now we have to solder wires for powering up the motors. I am using Red and Black wires for the connection. If you are making mobile control car using Arduino, Then I would suggest you do all the same wiring connections as shown in the picture.
Motor Wire Connection Notes:
- Make sure you are using Good Soldering Iron for Soldering.
- Use High-Quality Solder Wire for Good solder joints.
- For any loose wiring (Dry Solder) Arduino Bluetooth remote control car may not work properly.
Step 3:
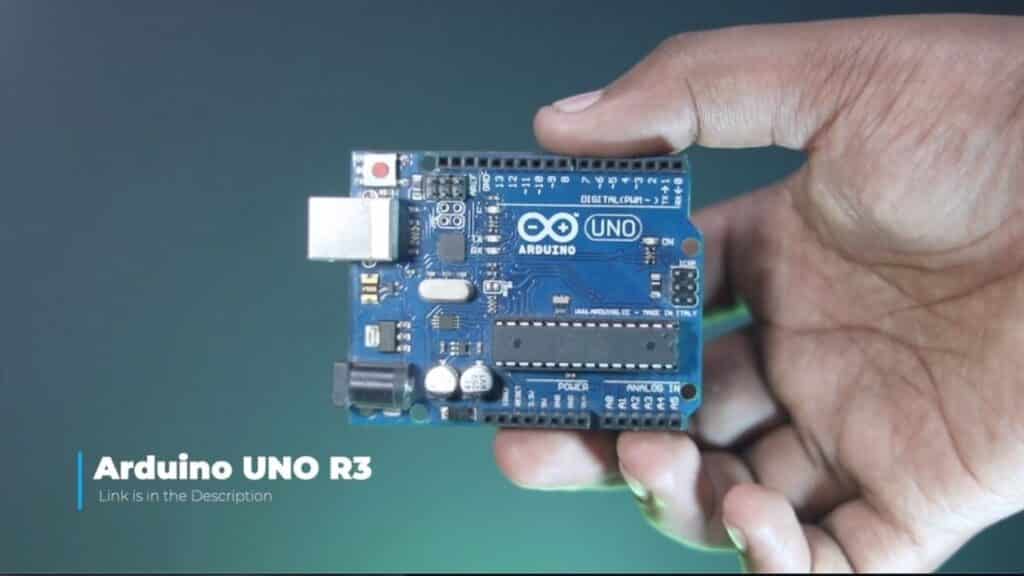
For making bluetooth car with speed control we are using Arduino UNO. This board is the main Heart of the Project.
Which Arduino You Should use?
- Here I am using the original Arduino UNO. So, it will not need any type of modification.
- Some Arduino boards come with SMD Version of Atmega328P IC. Those Clone boards will also work just fine for Arduino Bluetooth controlled car with Front & Back Lights.
- You can also Use any Chinese clone of Arduino UNO. Some of that boards have CH340 IC as the bootloader. For any windows computer, the driver of CH340 is not pre-installed (MAC users don’t need any modification)on your device. So you will have to install the necessary drivers to upload code to Arduino.
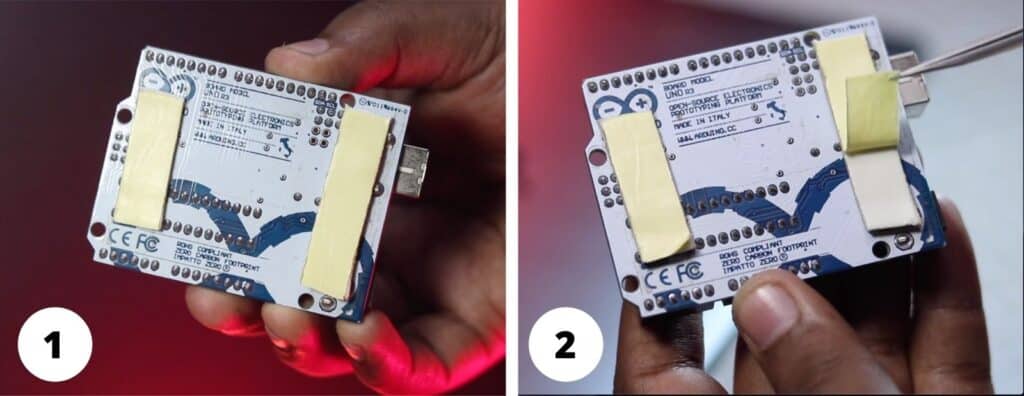
Now we have to attach the Arduino UNO to the Chassis. So, I am using Double-sided tape for this. You can also Drill holes on the Chassis and attach the Arduino Board with M3 Screws.
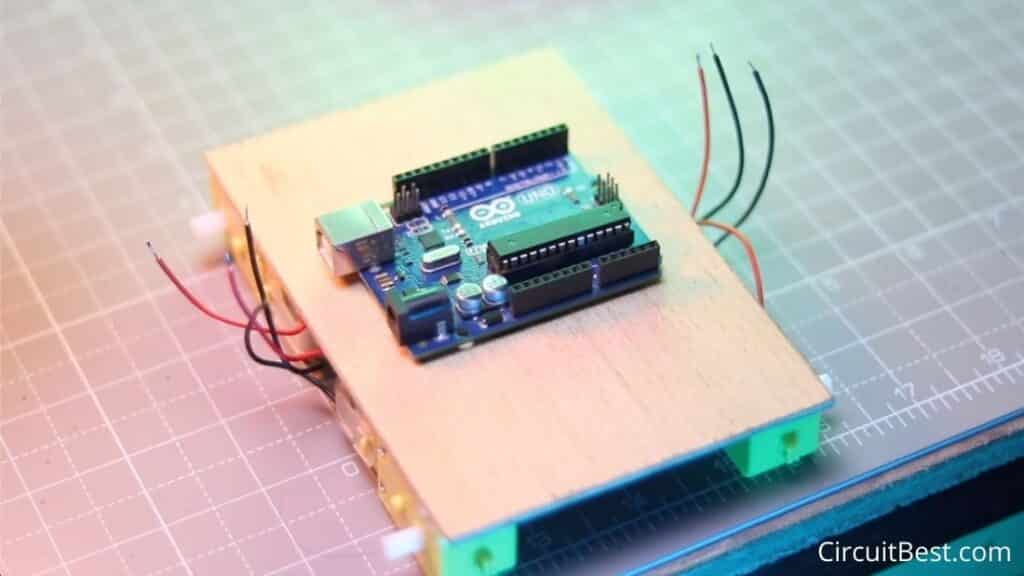
Now I have connected the Arduino with the chassis and this will look as shown in the picture and make the Arduino Bluetooth controlled car with Front & Back Lights.
Step 4:
For the bluetooth controlled car using Arduino project report we will need a motor driver to run the 4 motors. So, we are using L293D motor Driver.
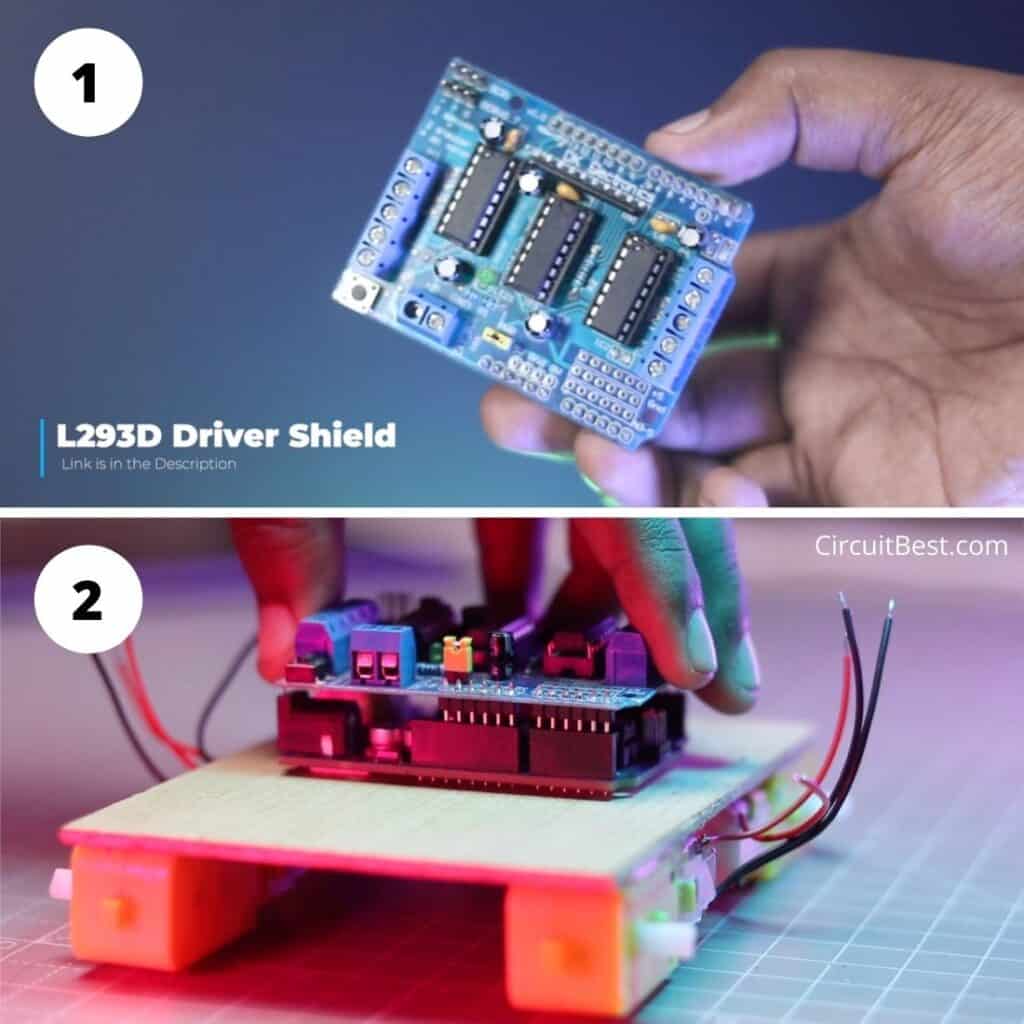
The main purpose of using the L293D Motor driver is that it is really easy to use and implement in the code. You will just need the Adafruit Motor Shield Library and a few lines of code for controlling the car.
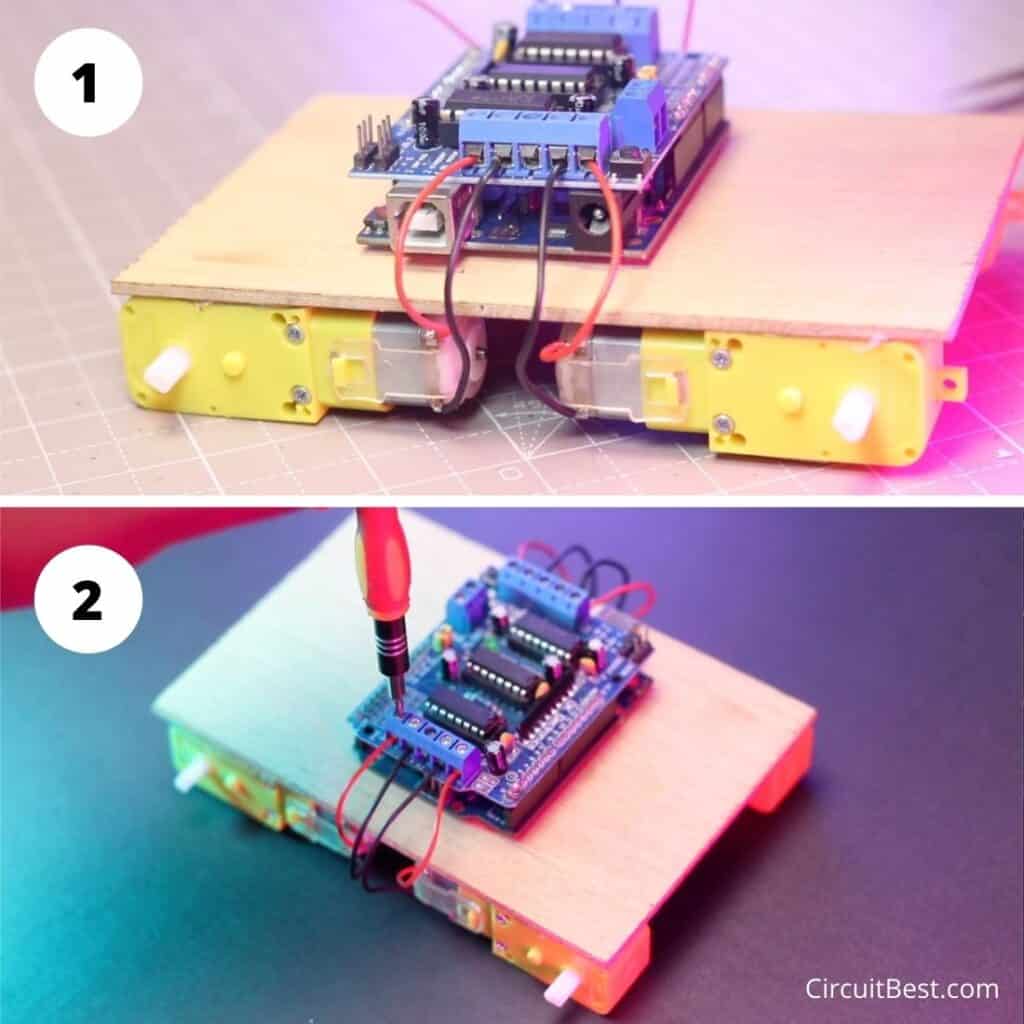
Now Attach the L293D driver on the Arduino UNO for Arduino Bluetooth car with speed control.
You can follow the above picture for wiring the motor. I would suggest you connect the motors as shown in the picture (Try to maintain the Red wire and the Black wire Placement). So It will be easy for you to replicate the project.
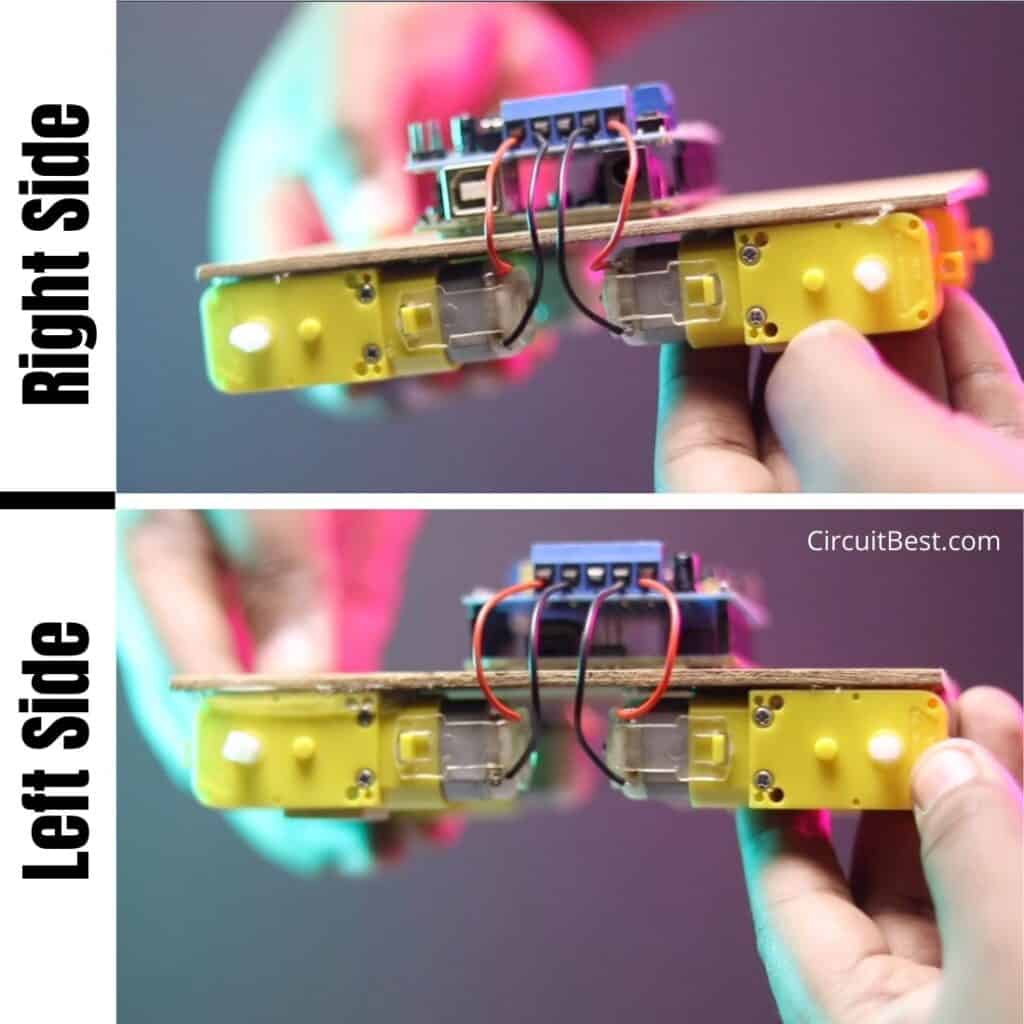
Here is the clear picture of the Left and the right side.
Motor Driver Connection Notes:
- As this is a Shield. So, It fits on the Arduino Uno or Arduino Mega.
- No, Need to connect extra wires to power the Arduino. If you give power to the Motor shield then that power from the shield goes directly to the Arduino UNO.
- This L293D driver has 4 Outputs so you can control 4 motors individually.
- This L293D Motor Driver’s max current per channel is 1A.
Step 5:
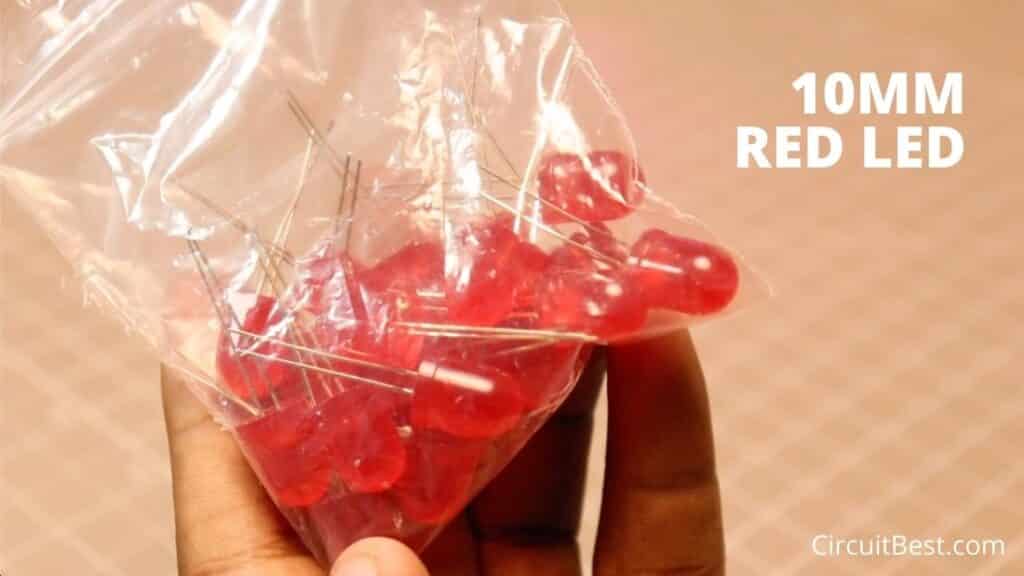
For the Back Lights, I am using 10MM Red LEDs. This is really great for this type of DIY Project. Now we have to connect the LED with the car.
But we can’t Directly attach the LED to the car. Because LED needs a certain voltage to run. Now If you provide and higher voltage than its tolerance then the LED will be fried.
So, Here comes another component that is called Resistance. We mainly use resistance for the current limitation. For this project, you can use any of the following resistors.
Resistor Selection:
The Higher the Resistor value the Lower LED Brightness. My recommendation will be the highlighted options for making an Arduino Bluetooth controlled car with Front & Back Lights.
| Source Voltage | Resistor Value |
| 12V Battery (3S Li-ion) | 470Ω, 510Ω, 820Ω, 1k, 2.2k |
| 9V Battery (~2S Li-ion) | 180Ω, 220Ω, 330Ω, 470Ω |
| 5V Battery (Power Bank) | 100Ω, 180Ω, 220Ω |
Here I have provided some of the resistor values this will help you to make the car. Here I am going to use a 2S Li-ion Battery (2 Batteries in series configuration).
So, The Max voltage will be 4.10V x 2= 8.20V
The 8.20V lies between 9V and 5V So, here I chosen the 180 Ohm Resistor for the Current Limitation. This will save the Light frying from over voltage and give an optimal brightness.
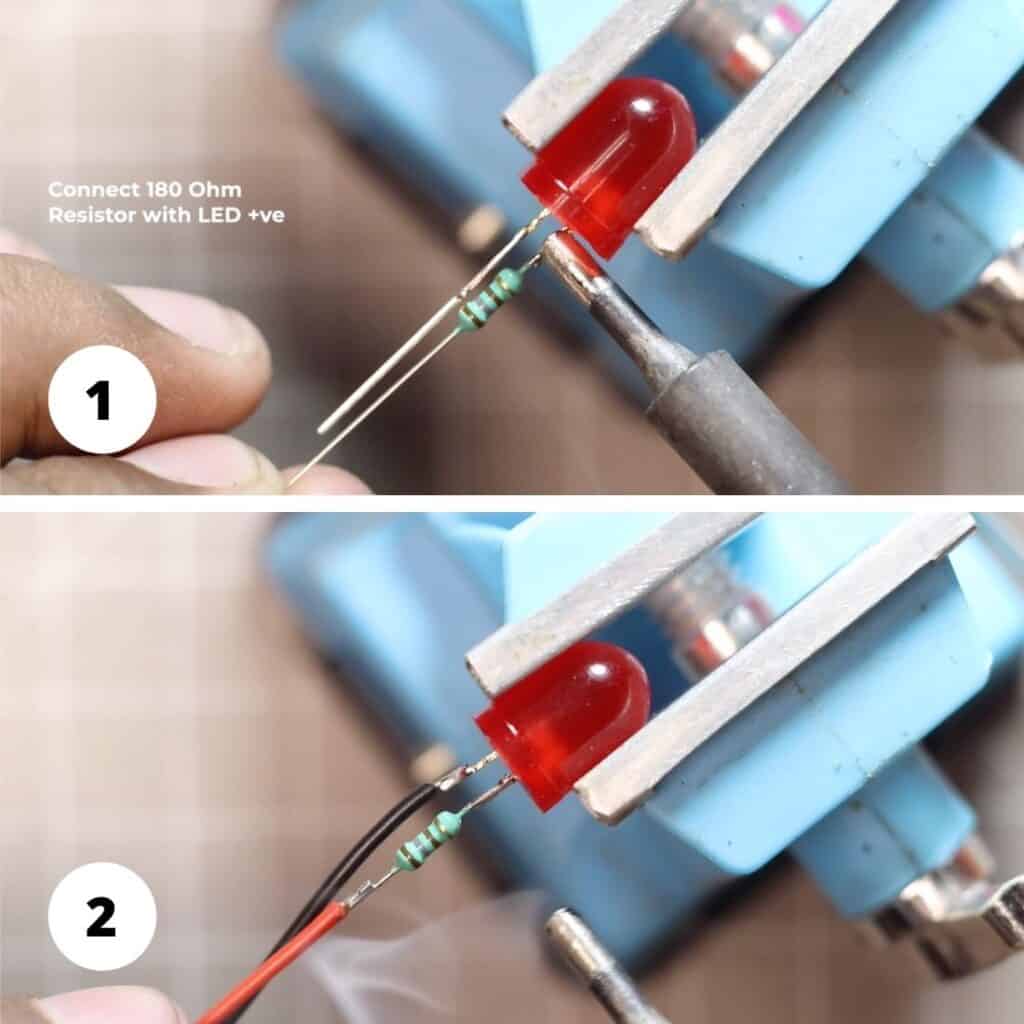
Here I have connected the LED +ve with the 180 Ohm Resistor and the LED -ve is connected with the Black Supply wire. and the Red wire is connected with the 180 Ohm resistor Out. So, we will give power to the Red and the Black wire.
Now I used a Heat shrink tube for protecting the connections. After the Heat shrinking the LEDs will look like as shown in the 2nd picture.
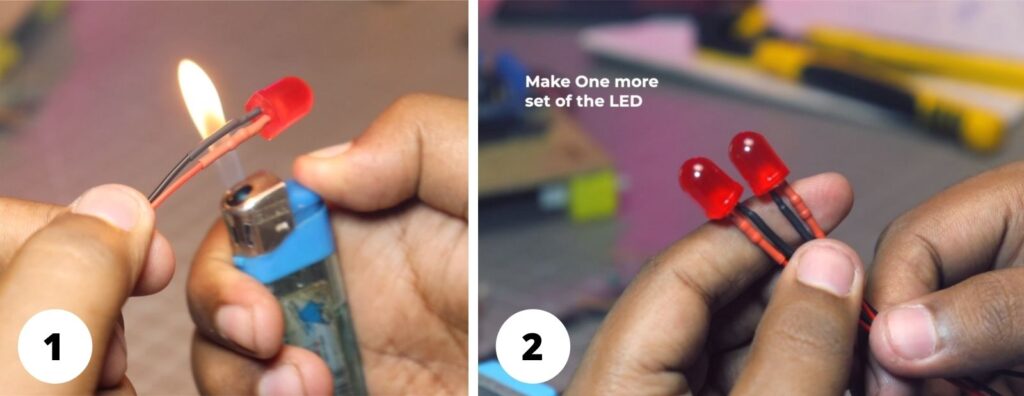
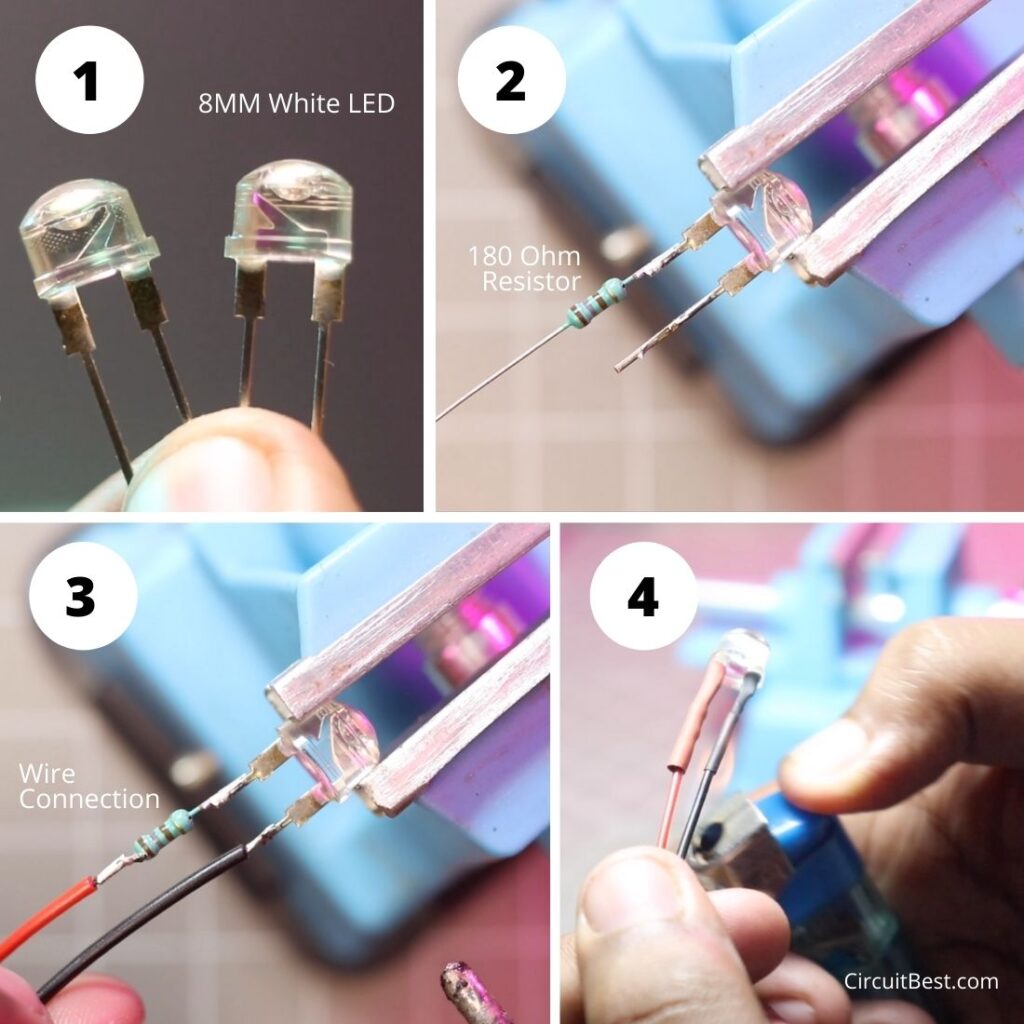
In the same process, I would prepare the front light also. Here I also connected the 180 Ohm resistor with the LED +ve. And the Red and Black wire is connected with the Resistor out and the LED -ve respectively.
In the same way, I used heat shrink tube for securing all the connections.
Step 6:
After all these steps we would get 2 pairs of front and backlights. Now before connecting with the chassis we need to verify that the LEDs are working or not. Here we will use a 18650 battery for testing the LEDs.
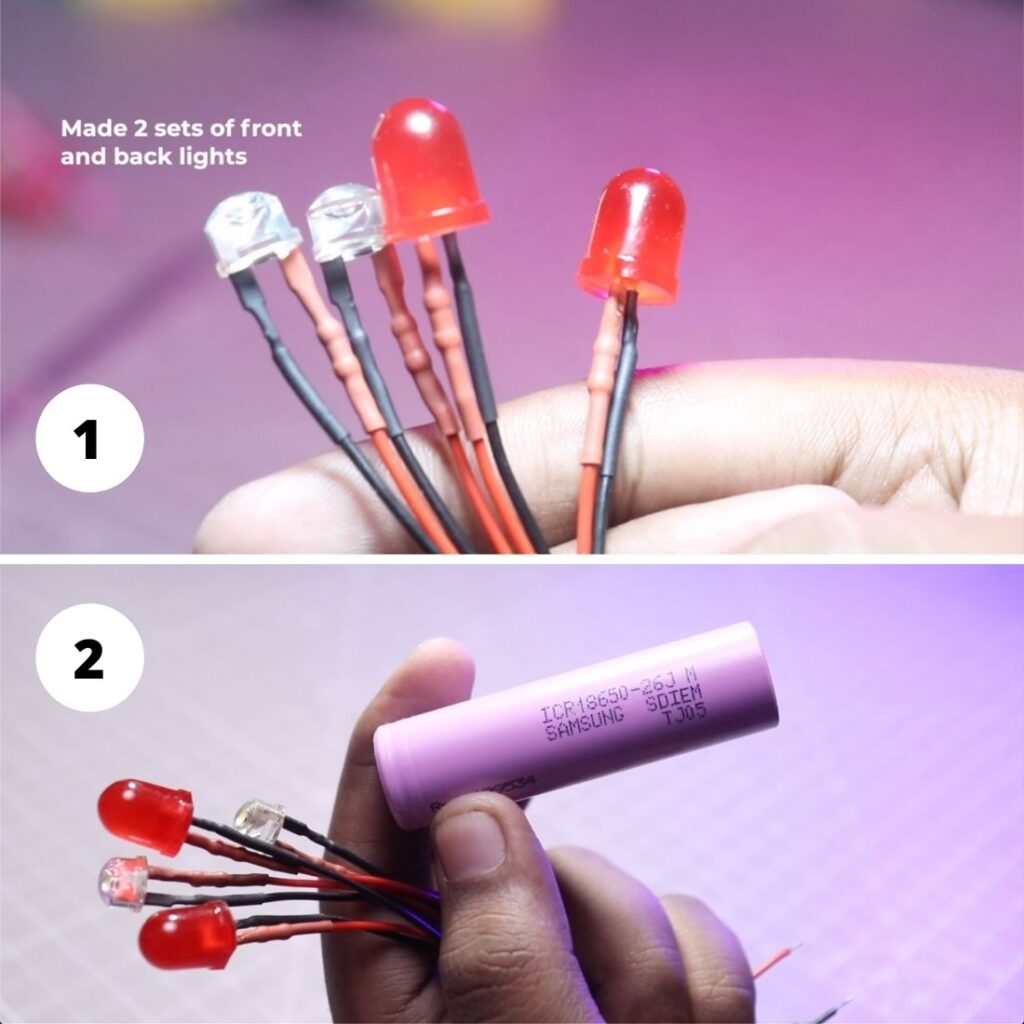
Just take your time. and test all the LEDs one by one. Make sure your Li-ion Battery has sufficient charge inside it. otherwise, you will not be able to perform this test. As we are testing the LEDs we using 1, 18650 Battery. So, while testing the brightness will be lower.
LED Selection Note:
- Here I used 8MM White LED and 10MM Red LED. You can also use general 5MM, 3MM LEDs.
- The resistor values will remain the same for 5MM, 3MM LEDs.
- Here you can use a 1/4W Resistor for the given values.
- Make sure you have connected the Red and Black wire correctly otherwise the LEDs will not run properly.
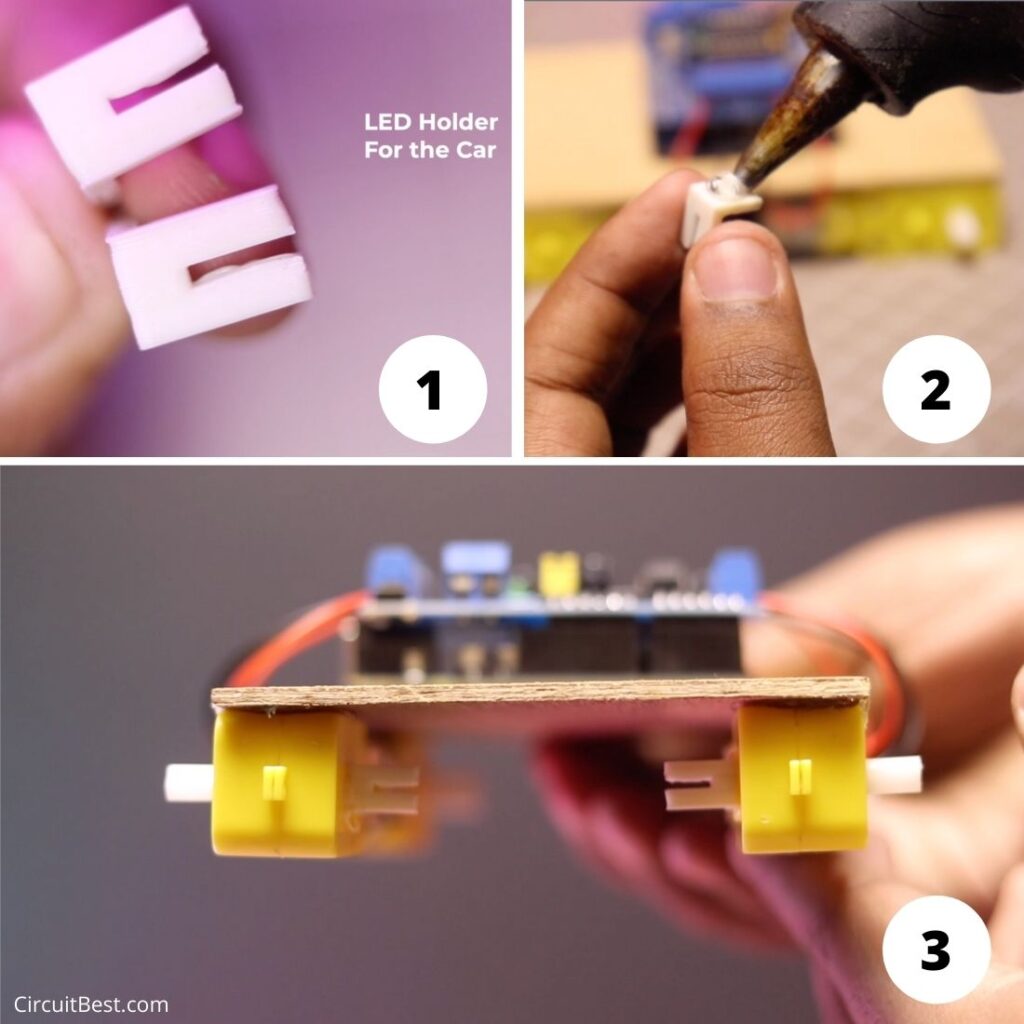
Step 7:
Now for connecting the LEDs with the changes I have designed this 3D Model in Tinkercad and I will attach this on the Chassis with a glue gun so that It can act as a Light Holder.
After attaching the LED holder with Hot Glue the Car will look Like this.
Extras:
- Make sure you are using a very small amount of glue for attaching the Holder with the Bluetooth-controlled Car.
- If you are using Instant Glue then attach it carefully, Otherwise, the Car shaft may be blocked with the glue.
- Here I used Anet ET4 Pro 3D Printer for Printing the Holder.
First, connect the LED wires with the L293D Motor Driver shield for making a remote control car with Arduino. Just follow the all necessary connections as shown here.
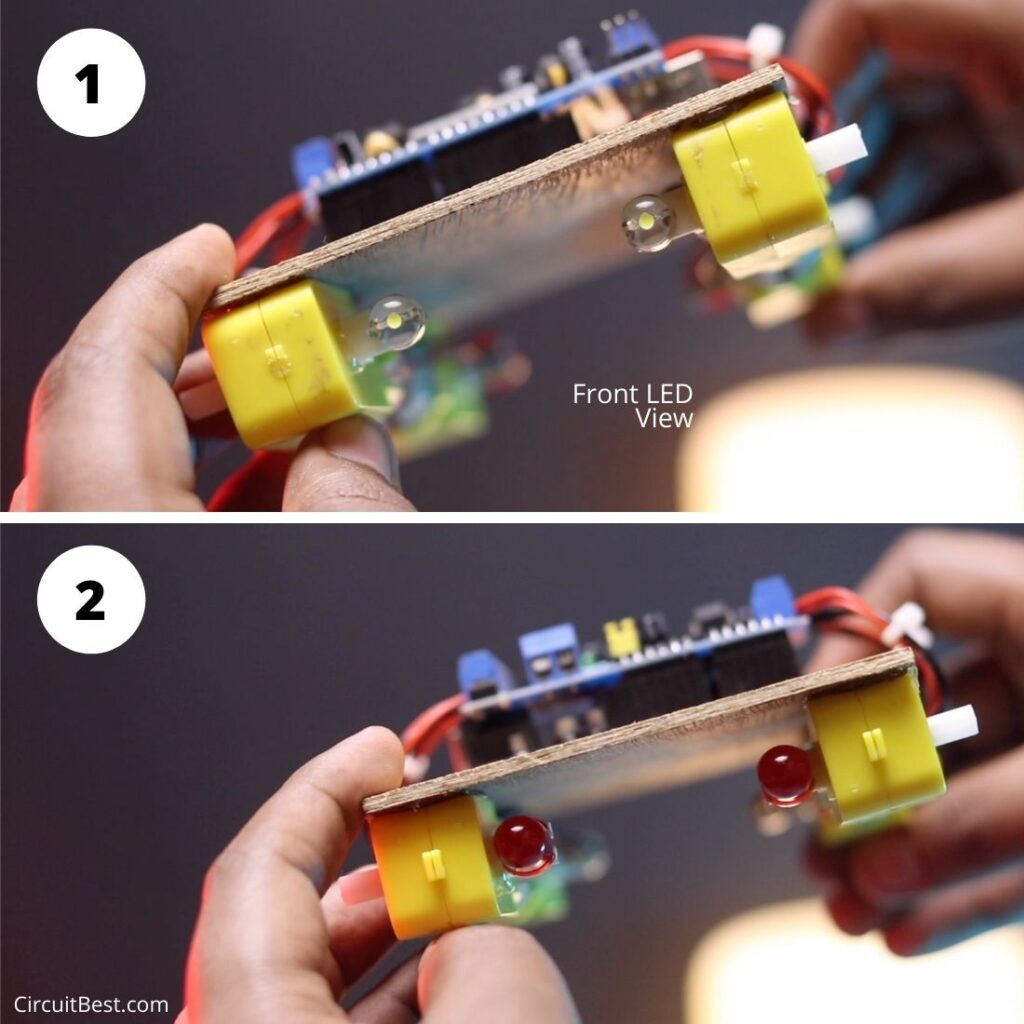
Now I have placed all the LEDs in their respective place. 8MM White LEDs at the front of the car chassis and I also Placed 10MM Red LEDs at the back of the car chassis. You can follow the same process as shown below for creating an Arduino Bluetooth control car with Front & Back Lights.
This is the close-up shot of the Front LED and the Back LED view. This looks really neat and clean.
Step 8:
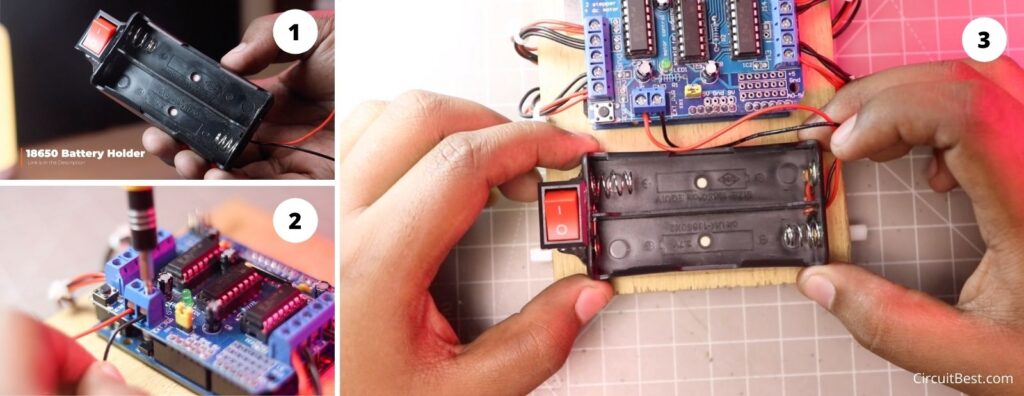
The next part is the battery connection part. Here I am using 2S Li-ion Battery for running the car. the L293D supports 12V as well. So, if you want higher speed then you can also use 3s Li-ion Battery as well.
Here I have also added a switch for turning On/ Off the car. The connection of the switch is really simple. We have to connect the switch in series with the battery +ve. After that, the Switch Out (Battery +ve) and the Black Wire (Battery -ve) will be connected with the Motor Shield Power Input.
Step 9:
Now to make an Arduino Bluetooth car control app we will need a wireless receiver. For the wireless signal transmission to the car here we are using the HC-05 Bluetooth Module. This is a commonly used module for making different types of wireless signal transmission projects.
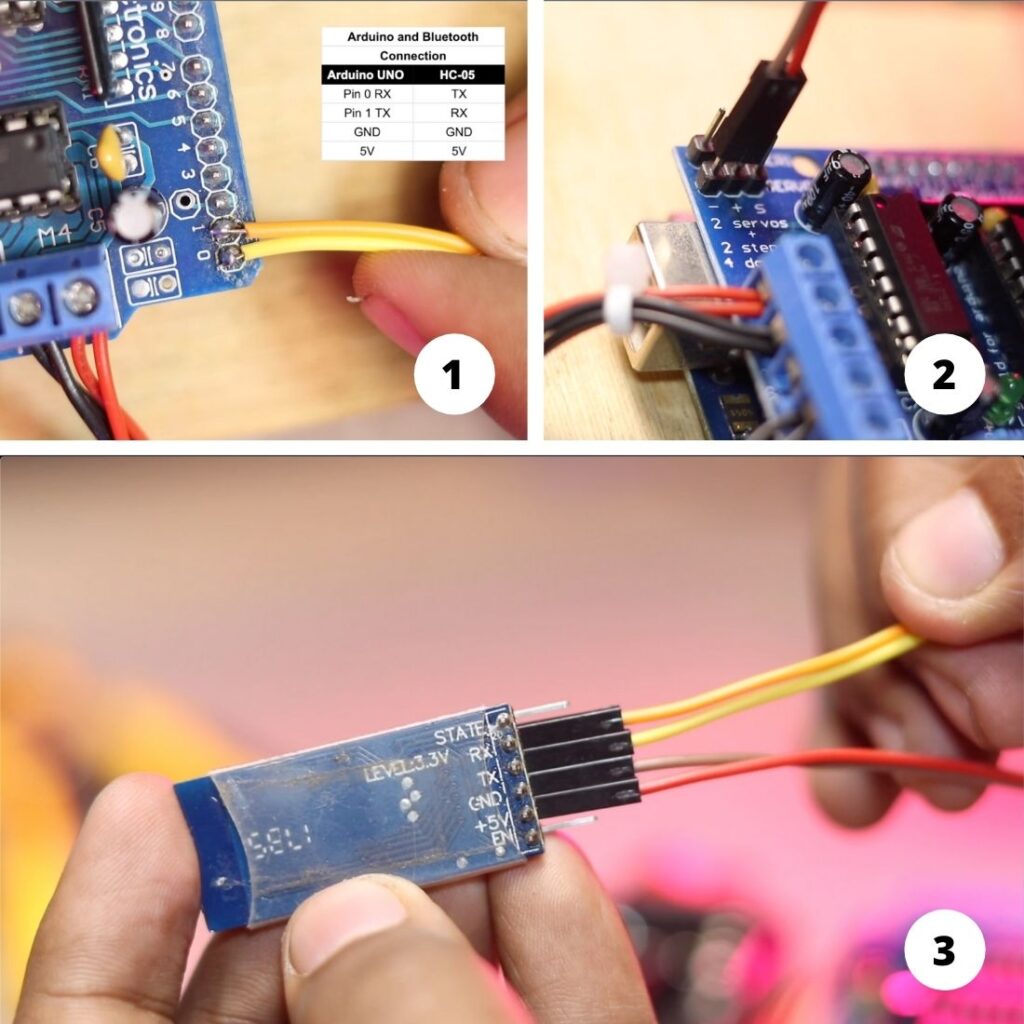
HC-05 has 6 Pins But we would need RX, TX, GND, +5V pins. Here the GND and the +5v pin is for power. and the RX and the TX pin is for signal Transfer. Here I used Female Female Jumper for giving power.
For the data Transfer I have soldered the RX and the Tx wires with the 1 & 2 Pin respectively.
Arduino and HC-05 Bluetooth Module Connection:
Here is the simple pinout connections for connecting with Arduino Uno with the HC-05 Bluetooth Module. Connect it accordingly.
| Arduino Uno | HC-05 Module |
| Pin 0 Rx | Tx |
| Pin 1 Tx | Rx |
| GND | GND |
| +5V | +5V |
Some Notes about HC-05 Bluetooth Module:
- Some people suggest giving 3.3V power to the HC-05 Bluetooth Mode for making the Arduino Bluetooth control car with L293D. Their main logic is that the HC-05 module runs with +3.3V. If you connect the HC-05 Bluetooth module with 5V it may get damaged. For these people, I would tell that the HC-05 Module has an inbuilt voltage regulator for 5V to 3.3V. So, You don’t need to worry if you are powering the HC-05 Module with 5V Input from Arduino.
- While soldering the RX and the TX jumpers with the L293D make sure you don’t short the pins of the shield. Otherwise, Arduino may be damaged. So, try to do a clean job in the soldering task.
Step 10:
Now We have to upload the code to the Arduino UNO. So, we will connect the Arduino UNO’s USB poet with the PC COM Port. First. Now If you are using Original Arduino that is labeled as “Made in Italy” then you will not need any modification. If you are using a Chinese clone with SMD Chip mounted on the Arduino then most likely you have to install the CH340 driver. Here we are using the Arafruit Motor shield library for running the Bluetooth-controlled Car. So you need to go to the following and then search for Adafruit Motor Shield Library.
Sketch > Include Library > Manage Libraries Option > Search “adafruit motor shield” > Install it.
In this way you can install any library for your Arduino projects other than Arduino Bluetooth controlled car with Front & Back Lights.
Some Key Factors while Uploading the code to Arduino:
- Make Sure you are installing Exactly the same Library as shown in the project. If you install any other library with this code then the chances are your car will not work.
- Before Uploading the code you must disconnect Bluetooth module HC05 power. Otherwise, your code will not be uploaded to Arduino.
- While uploading the code make sure that you are selecting the right COM port and the Board as Arduino UNO.
- While uploading the code it is recommended not to use any external power. Let me tell you why… If you have connected the Arduino in the wrong way Suppose you have connected the Battery in the wrong polarity. Then not only your Arduino Uno will be damaged also your PC COM port may be damaged.
Arduino Bluetooth Control Car Code:
Here is the simple Bluetooth control car code that you can use for your school or college project. For the lighting, you don’t need to change any parameters in the code. You Just have to connect all the LEDs in the right way as shown in the video and you are good to go for using Arduino Bluetooth controlled car with Front & Back Lights.
/*
Code Name: Arduino Bluetooth Car with Front and Back Light Control
Code URI: https://circuitbest.com/category/arduino-projects/
Before uploading the code you have to install the "Adafruit Motor Shield" library
Open Arduino IDE >> Go to sketch >> Include Libray >> Manage Librays...  >> Search "Adafruit Motor Shield" >> Install the Library
AFMotor Library: https://learn.adafruit.com/adafruit-motor-shield/library-install
Author: Make DIY
Author URI: https://circuitbest.com/author/admin/
Description: This program is used to control a robot using an app that communicates with Arduino through an HC-05 Bluetooth Module.
App URI: https://bit.ly/3mn6LuZ
Version: 1.0
License: Remixing or Changing this Thing is allowed. Commercial use is not allowed.
*/

#include <AFMotor.h>

//initial motors pin
AF_DCMotor motor1(1, MOTOR12_1KHZ);
AF_DCMotor motor2(2, MOTOR12_1KHZ);
AF_DCMotor motor3(3, MOTOR34_1KHZ);
AF_DCMotor motor4(4, MOTOR34_1KHZ);

int val;
int Speeed = 255;

void setup()
{
  Serial.begin(9600);  //Set the baud rate to your Bluetooth module.
}
void loop(){
  if(Serial.available() > 0){
    val = Serial.read();

    Stop(); //initialize with motors stoped

          if (val == 'F'){
          forward();
          }

          if (val == 'B'){
          back();
          }

          if (val == 'L'){
          left();
          }

          if (val == 'R'){
          right();
          }
          if (val == 'I'){
          topright();
          }

          if (val == 'J'){
          topleft();
          }

          if (val == 'K'){
          bottomright();
          }

          if (val == 'M'){
          bottomleft();
          }
          if (val == 'T'){
          Stop();
          }
  }
}


void forward()
{
  motor1.setSpeed(Speeed); //Define maximum velocity
  motor1.run(FORWARD); //rotate the motor clockwise
  motor2.setSpeed(Speeed); //Define maximum velocity
  motor2.run(FORWARD); //rotate the motor clockwise
  motor3.setSpeed(Speeed);//Define maximum velocity
  motor3.run(FORWARD); //rotate the motor clockwise
  motor4.setSpeed(Speeed);//Define maximum velocity
  motor4.run(FORWARD); //rotate the motor clockwise
}

void back()
{
  motor1.setSpeed(Speeed); //Define maximum velocity
  motor1.run(BACKWARD); //rotate the motor anti-clockwise
  motor2.setSpeed(Speeed); //Define maximum velocity
  motor2.run(BACKWARD); //rotate the motor anti-clockwise
  motor3.setSpeed(Speeed); //Define maximum velocity
  motor3.run(BACKWARD); //rotate the motor anti-clockwise
  motor4.setSpeed(Speeed); //Define maximum velocity
  motor4.run(BACKWARD); //rotate the motor anti-clockwise
}

void left()
{
  motor1.setSpeed(Speeed); //Define maximum velocity
  motor1.run(BACKWARD); //rotate the motor anti-clockwise
  motor2.setSpeed(Speeed); //Define maximum velocity
  motor2.run(BACKWARD); //rotate the motor anti-clockwise
  motor3.setSpeed(Speeed); //Define maximum velocity
  motor3.run(FORWARD);  //rotate the motor clockwise
  motor4.setSpeed(Speeed); //Define maximum velocity
  motor4.run(FORWARD);  //rotate the motor clockwise
}

void right()
{
  motor1.setSpeed(Speeed); //Define maximum velocity
  motor1.run(FORWARD); //rotate the motor clockwise
  motor2.setSpeed(Speeed); //Define maximum velocity
  motor2.run(FORWARD); //rotate the motor clockwise
  motor3.setSpeed(Speeed); //Define maximum velocity
  motor3.run(BACKWARD); //rotate the motor anti-clockwise
  motor4.setSpeed(Speeed); //Define maximum velocity
  motor4.run(BACKWARD); //rotate the motor anti-clockwise
}

void topleft(){
  motor1.setSpeed(Speeed); //Define maximum velocity
  motor1.run(FORWARD); //rotate the motor clockwise
  motor2.setSpeed(Speeed); //Define maximum velocity
  motor2.run(FORWARD); //rotate the motor clockwise
  motor3.setSpeed(Speeed/3.1);//Define maximum velocity
  motor3.run(FORWARD); //rotate the motor clockwise
  motor4.setSpeed(Speeed/3.1);//Define maximum velocity
  motor4.run(FORWARD); //rotate the motor clockwise
}

void topright()
{
  motor1.setSpeed(Speeed/3.1); //Define maximum velocity
  motor1.run(FORWARD); //rotate the motor clockwise
  motor2.setSpeed(Speeed/3.1); //Define maximum velocity
  motor2.run(FORWARD); //rotate the motor clockwise
  motor3.setSpeed(Speeed);//Define maximum velocity
  motor3.run(FORWARD); //rotate the motor clockwise
  motor4.setSpeed(Speeed);//Define maximum velocity
  motor4.run(FORWARD); //rotate the motor clockwise
}

void bottomleft()
{
  motor1.setSpeed(Speeed); //Define maximum velocity
  motor1.run(BACKWARD); //rotate the motor anti-clockwise
  motor2.setSpeed(Speeed); //Define maximum velocity
  motor2.run(BACKWARD); //rotate the motor anti-clockwise
  motor3.setSpeed(Speeed/3.1); //Define maximum velocity
  motor3.run(BACKWARD); //rotate the motor anti-clockwise
  motor4.setSpeed(Speeed/3.1); //Define maximum velocity
  motor4.run(BACKWARD); //rotate the motor anti-clockwise
}

void bottomright()
{
  motor1.setSpeed(Speeed/3.1); //Define maximum velocity
  motor1.run(BACKWARD); //rotate the motor anti-clockwise
  motor2.setSpeed(Speeed/3.1); //Define maximum velocity
  motor2.run(BACKWARD); //rotate the motor anti-clockwise
  motor3.setSpeed(Speeed); //Define maximum velocity
  motor3.run(BACKWARD); //rotate the motor anti-clockwise
  motor4.setSpeed(Speeed); //Define maximum velocity
  motor4.run(BACKWARD); //rotate the motor anti-clockwise
}


void Stop()
{
  motor1.setSpeed(0); //Define minimum velocity
  motor1.run(RELEASE); //stop the motor when release the button
  motor2.setSpeed(0); //Define minimum velocity
  motor2.run(RELEASE); //rotate the motor clockwise
  motor3.setSpeed(0); //Define minimum velocity
  motor3.run(RELEASE); //stop the motor when release the button
  motor4.setSpeed(0); //Define minimum velocity
  motor4.run(RELEASE); //stop the motor when release the button
}
Arduino Bluetooth car control with Front and Back Lights App:
Step 11:
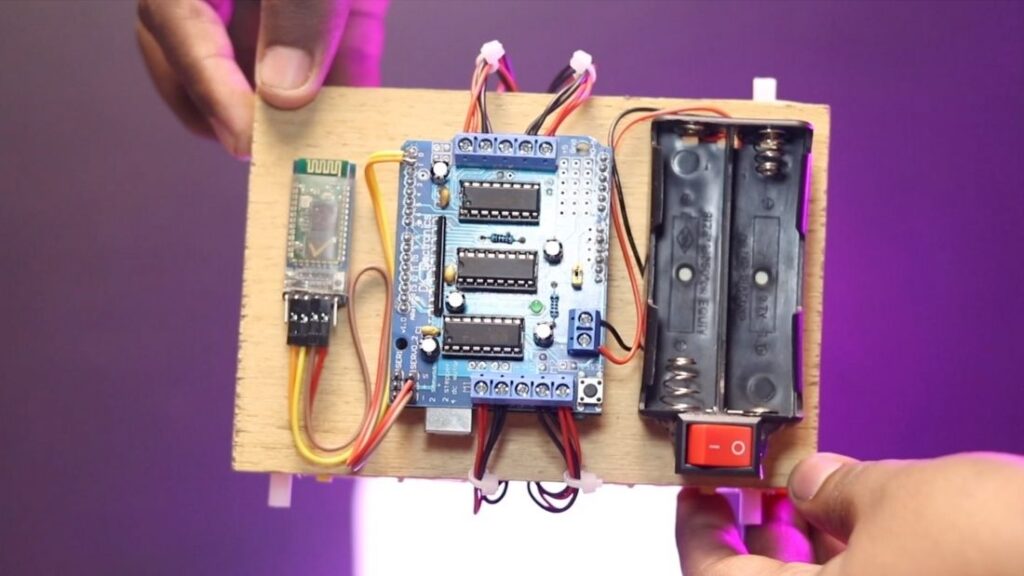
For the Battery Here I am using 2, Samsung 2600mAh Li-ion Batteries. I attached the batteries on the holder and then turn the switch on for testing the car.
Steps to connect the Bluetooth controlled car with Phone:
- First open the “Make DIY” App.
- Currently this app is only available for android users.
- Now Turn on your Phone’d Bluetooth. Then Connect with the HC-05 Bluetooth Module.
- If you have a Fresh New HC-05 then you have to do one more step before all this steps.
- First go to your bluetooth settings.
- Then search for Bluetooth Devices.
- After that you will Find a Bluetooth Device named HC-05.
- Then first pair the bluetooth device with your phone.
- For pairing, you have to add a default Password.
- Generally the Password is 1234 or 0000.
- Just give the password and you are now your Bluetooth Controlled car is connected with your Android Device.
Here you can see the Motors are rotating with a phone button press. And also the Lights are glowing perfectly. Here you can see when you press the top arrow then only Front LEDs Glows and similarly when you press the Bottom arrow then the Backside Red LEDs glows. So the Lighting Part is working perfectly.
Here is the final testing with the Tire connected to the car. In this project, I used general 65mm TT Motor Tires. The car runs fluently. No Data Transmission loss is there. The car moves just instantly. Now, Our Arduino Bluetooth controlled car with L293D is working perfectly with Front and Back Lights. Here I can announce this project is a Great Success.
Conclussion:
From this fun project, we understand how basically a Bluetooth-controlled car with Front and backlights has been made in real life with Arduino. Here you can get vast electronics knowledge from this project. If you are an electronics enthusiastic person then you should definitely try this project in your home. I would suggest you follow the “Make DIY” YouTube Channel with more amazing content like this.