
Introduction:
Today in this article we are going to learn how to repair soldering iron not heating. It is very easy to repair a Soldering Iron. A soldering Iron has a Heating Element and a Control Circuit for Adjusting the Temperature. So, we will Discuss In Detail how we can repair all this thing.
Needed Components:
- 60w Heating Element: https://www.utsource.net/itm/p/8423764.html
- BT136 Triac: https://www.utsource.net/itm/p/4292266.html
Tools Needed:
- Nose Plair: https://www.utsource.net/itm/p/7617196.html
- Screw Diver: https://www.utsource.net/itm/p/7617223.html
- Soldering Iron: https://www.utsource.net/itm/p/8423764.html
Watch Video:
Here is the video about how to repair the soldering iron heating element on YouTube and you will understand everything.
How Basically soldering iron heating element wiring Works?
- The soldering iron heating element wiring is cylindrical. This type of coil is very Good for Extensive Uses.
- If you don’t break the soldering iron tip then the soldering Iron will work so many days. Even I was using a soldering Iron about $9. But you would not believe how good the soldering Iron Is?
- there are mainly 2 Components inside soldering iron. One is a Heating Element and another is a Temperature adjustment control. In some expensive soldering iron, there is a thermal shutdown feature also available. In this case, soldering iron coil wire will be turned off if it has reached a certain temperature.
- Here we are not covering that advanced type of soldering Iron. We will basically cover the simple one.
What Actually Happened in my soldering Iron and why was soldering iron not heating?
One I was working on a project where I have to solder a PCB. But that time a sudden sound came from the soldering iron. After that, the RED Indicator LED of the Soldering Iron has stropped working. I checked the Tip Temperature was not Increasing. So, I basically found that there is some kind of defect happened in the soldering Iron, as a result, I had to repair It to continue my Working Project.
So, This is what actually happened.
Steps for Repairing soldering iron not heating:
Step1:
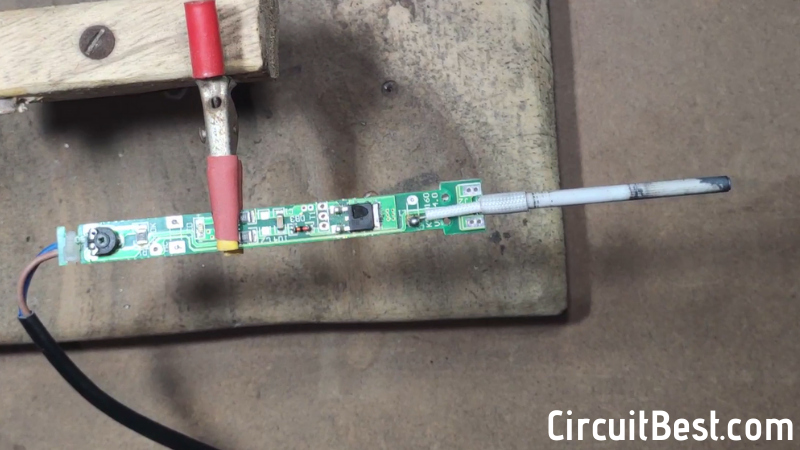
Open the Soldering Iron Carefully. Make sure You are not giving extra pressure to the Soldering tip. Otherwise, the Soldering Tip may Break.

Step 2:
Here you can see all the components from the soldering Iron. Here You can also see a Physically Damaged IC. This must be a Triac for voltage regulation. The circuit is like an LED Dimmer Circuit which I have made previously.
Step 3:
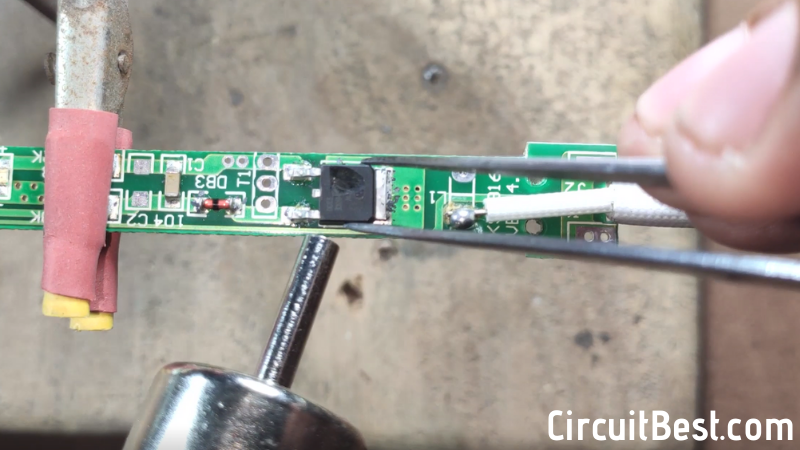
Then I removed the SMD Triac with a Hot Air Gun. If you don’t have this then you can also use another soldering Iron. for removing the Triac.
Step 4:
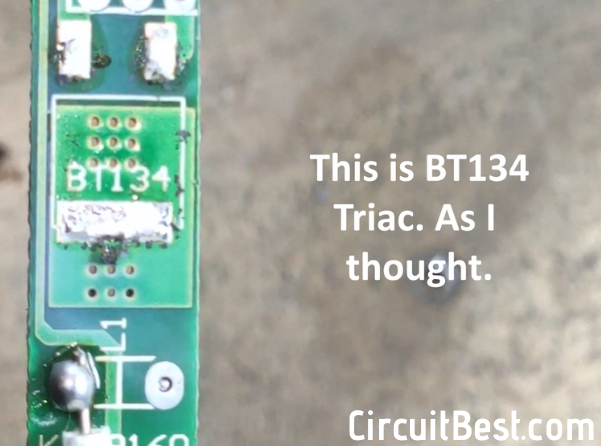
Here you can see it is written BT134. It is a Triac. So, My assumption was correct. This is an SMD Component. In my local market, only THT components were available, SMD was not available. When I saw some datasheets then I find that BT136 is better than BT134. By the way, BT136 is widely available in the market at very cheap.
Step 5:
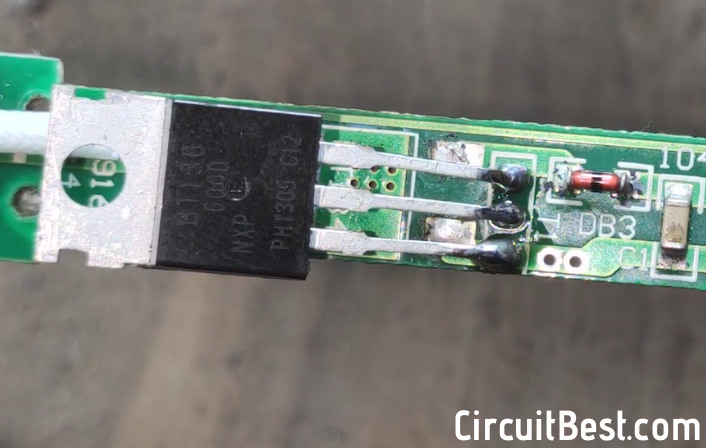
Then I soldered the BT136 and put it to in its Enclosure. and finally, the soldering iron is ready to use.
Note:
- My soldering Iron has a Physical Damage So, it is easy to understand for me.
- If you don’t have physical damage then you have to check the Heating Element first. with the help of Multimeter, in Continuity Mode. after that beep sound will cone. Otherwise, the filament is damaged. then you have to buy a new one.
- Not it is the Triac’s turn. The Triac has 3 Legs, Just check any two points Continuity if it gives Beep sound then you should think that your Triac is Damaged. In this way, you don’t have to remove the Triac from the PCB. You can check the Triac form the PCB as well. this is a Very good Technique.
Conclusion:
So, all in all, soldering iron is the most important thing for electronic enthusiasts. Here you can see to fix soldering iron filament I have to use another soldering iron. So, I will highly recommend you to keep 1 pair of soldering Iron. One like this and another cheap $2 soldering Iron for Emergency purpose. In my case I find a Physically Damaged IC so, It is very easy for me to find the problem. So, in conclusion, to repair soldering iron we need a Soldering Iron.
You Can also Read our other Article About Android Controlled RGB LED Strip Using Arduino