
Introduction:
In this article, we are going to discuss a simple audio amplifier circuit with a BC547 transistor. Here you will find the full schematics and other more information. So with that being said let’s start our article. And also I will be talking about our sponsors UTSOURCE in this article.
Needed Components:
- BC547: https://www.utsource.net/itm/p/876498.html
- 5MM LED: https://www.utsource.net/itm/p/6831354.html
- 10k Resistor: https://www.utsource.net/itm/p/8328095.html
- 100k Potentiometer: https://www.utsource.net/itm/p/8038958.html
Tools Needed:
- Soldering Iron: https://www.utsource.net/itm/p/8423764.html
- Iron Stand: https://www.utsource.net/itm/p/7722853.html
- Nose Pliers: https://www.utsource.net/itm/p/7671655.html
- Flux: https://www.utsource.net/itm/p/8423764.html
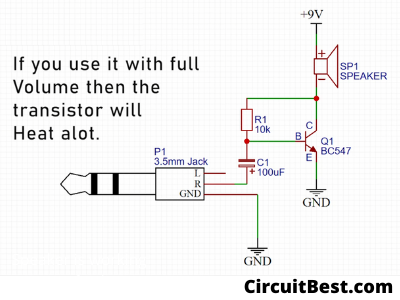
Schematics of simple Basic audio amplifier circuit:
This is the Schematics of the Circuit Diagram of Audio amplifier with BC547 transistor.
YouTube video:
How does the Basic audio amplifier Circuit work?
This circuit works on the basic principles of the NPN transistors. The low amplitude Audio signal goes into the base of the transistor.
Then the signal flows through the transistor’s collector to emitter, as a result, the current will flow then the base gets a signal.
A capacitor is connected in series with the base. This capacitor is used to smooth out the higher frequencies of the audio signal. (The signal which is coming from an audio signal)
Then this signal amplifies through the transistor’s collector pin.
Steps for making the Amplifier Circuit:
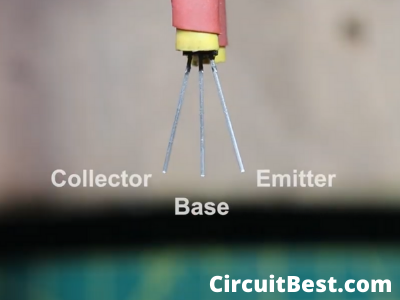
Step 1:
First, we will need a BC547 transistor. And these are the Pinouts of the BC547 Transistor.
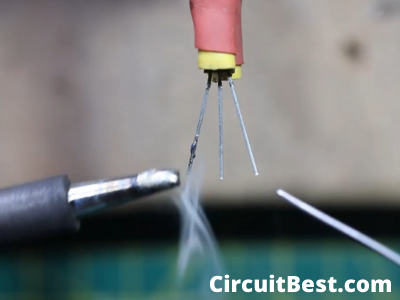
Step 2:
Now take a Soldering Iron and then pre tin the Legs of the Soldering Iron.
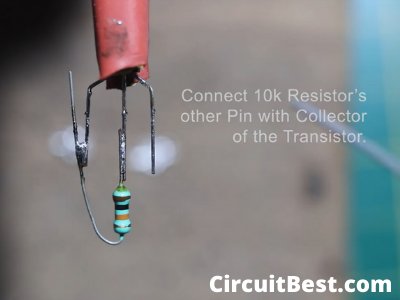
Step 3:
Now you will need a 10K resistor. Then Connect the 10k Resistor with the Transistor’s Collector and the base Pin.
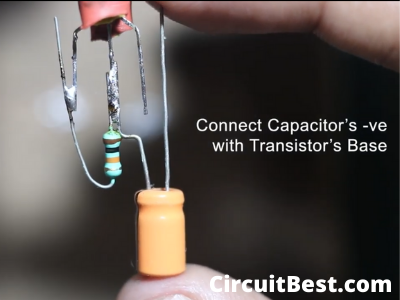
Step 4:
Now, You will need a 100uF Capacitor. Then Connect the Capacitor’s -ve Pin with Transistor’s Base.
Step 5:
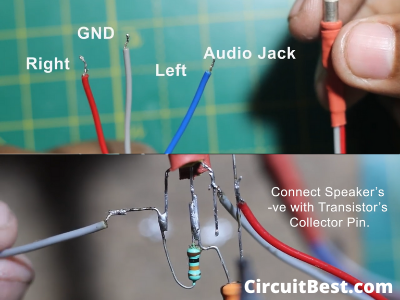
At next I want to run the amplifier with the Android Device. So, we will need a 3.5MM Headphone jack For this. From the Headphone jack, we will get three wires. Right Channel, GND, LEFT Channel wires. Since we are making a Mono Amplifier we will need only one Channel wire. It might be the Left Channel wire or the Right Channel wire.
In my case, I am using the Right Channel Wire.
Step 6:
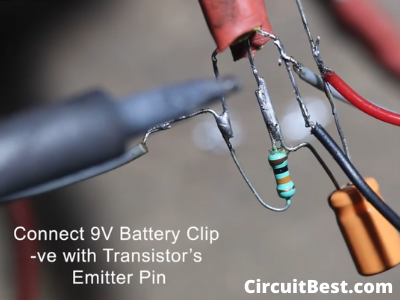
Now Connect the Battery wires with the circuit. In Specifically connecting the Battery -ve with the Transistor’s Emitter Pin.
Step7:
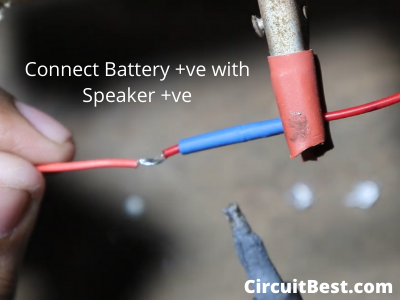
If you remember then you can see that we have missed the Speaker +ve wire. Now let’s connect the speaker +ve wire. Connect the Speaker wire with the Battery +ve.
Testing:
Here I have connected the circuit with the Android Device and then give the 9V Power supply. then I played free music from youtube and you can see that the audio is playing through the Speaker so it means the Speaker, as well as the Circuit, works perfectly.

Note:
The circuit is experimental only. It is not for practical usage. If you run a long time the circuit then the transistor will heat up quite a lot. As a result, the transistor may be damaged.
The efficiency of these types of amplifies is very low. So, you can’t use thin in practical cases. Make sure that Polarity is right otherwise the transistor will be instantly damaged.
You can run any 4 Ohm speakers easily.
That is all for this project if you like my post then you can also read another article on our website.